Monday, May 14, 2012

Photoshop CS6 Details


Need A Change? Photoshop CS6

Only babies are eager for a change.

Adobe would have you believe otherwise as they unveil the newest Photoshop version, CS6.
Should You Change to Photoshop CS6?

Adobe Photoshop CS5 was introduced not that long ago. Now we have the updated Photoshop CS6.
Rather than get all crazy by adding exotic or bizarre new features, Adobe has worked hard to simply improve upon the basics.

While many of the improvements are best suited to and for the benefit of  hard-core designers, overall I think all users can find a speedier workflow and improved finished photo edit quality.

That said, no amount of new or improved features will help you that much if you are still just getting to know Photoshop.

If you are relatively new, or just getting started with Photoshop, I'd recommend you spend your money instead on educational resources that will build your skills, rather than chasing after the latest and greatest software versions which might only increase your frustration.

Here are some of the recent CS6 updates and how they might affect you. Information I gleaned from around the web, not from my own personal experience. I'm not ready for a change...yet. 

Content Aware Patch is a nice addition (and improved tool) in removing objects from your scene.


Content Aware Move tool also give a lot more versatility in quickly creating the exact scene you need. 


The Crop tool functions are new and improved. It is just opposite now to how it worked before. It's tough to explain, but you'll quickly come to like it. This function is now non-destructive too, and comes with an integrated straightening tool which can increase your speed.

Pixel snapping behavior has been greatly improved by Align Edges and Snap Vector tools and the command "Transforms to Pixel Grid". These new tools improve image quality.

Layer styles can now be applied to groups.

Lens Blur now comes with three effect options.


New Oil Paint Filter does a really nice job of creating "painterly" scenes from your photos

Adaptive Wide Angle Correction helps to minimize distortion in your photos too.

New skin and face detection technology saves time when making portrait corrections.

Content Aware Patch and Move features greatly reduce errors now.

Group Clipping Masks are now available. Layers can now be clipped to groups, which makes for some cool masking opportunities.

You can search for layers now by layer type, name, effect (layer style), blending mode, color or by a large range of attributes.

Shapes are now created using their tool names. "Rectangle", "Rounded Rectangle" and "Ellipse" are used as names now instead of more generic, "Shape".

Auto Image correction is greatly improved, cutting down on the need for Levels and Curves adjustments .

The reaction time for Liquify, Puppet Warp, Crop, and Transform is greatly improved. It's more like real-time now.

Pressing 0 twice quickly now sets the layer opacity to 0%.

Shift-00 sets the fill opacity to 0%.

Rename layers quickly now using the new TAB feature to move up or down.

Shadows and Highlights adjustment has been improved to reduce halo effects.

There's a new RAW 7 import that works really well.

You can now change blend modes on multiple layers at once.

Pasting from Illustrator has been fixed.

Vector shapes pasted from Illustrator now always align to the pixel boundary.

Vector and bitmap layers now rotate exactly 90°, 180° and 270°.

Attribute changes are made simple. Right clicking on a vector layer in the layers panel presents these two new functions: Copy Shape Attributes and Paste Shape Attributes.

Command-J will duplicate anything now, including selections and groups.

Paragraph Styles and Character Styles let you store a text style and apply it quickly to text throughout your document.

A Stroke Layer Style option is available on paths now.

Feathering is now more accurate. Radius can be a floating point, instead of an number value.

Photoshop CS6 now autosaves as you work. Every 10 minutes by default, but there are settings to control the interval, if you wish.

A dialog box is available now to create shapes. When you know the exact size you'd like your shape to be, just select the corresponding shape tool, click anywhere on the canvas, and type in the dimensions you need.

The color picker now accepts HEX colors now that include a # and 3-digit HEX values.

Dimensions value box now, with Moving and Transforming features, will show a small box on the canvas with related values that change as you do the adjustment.

Locking multiple layers, is self explanatory.

Photoshop CS6 now comes with four different interface brightness options.

Dithered Gradient Layer Styles now let you create high quality gradients. In addition, the Gradient layer scale now goes to 1000%, up from 150%with CS5. However, the Gradient layer style range still maxes at 150%.

Video editing is now an option.

There you have it. 

You can see the folks at Adobe have worked really hard to make some changes that matter. So if you're ready for change, and have the bucks to fund it, go ahead and upgrade.

However, if your basic Photoshop skills could use some help, or you're not even sure how to begin creating beautiful photo edits, you'll be far better off investing in educational materials that offer a basic step-by-step method, or "recipe" for creating cool Photoshop scenes


My "Photoshop Recipe Cards" book sales are strong as ever. That tells me, there's still a lot of folks who still need to try out the basics before jumping on the latest Photoshop upgrade. Without the step-by-step basics, you'll only be confused at a higher level! The book is on sale now too.

Thursday, October 27, 2011

Photoshop Tips and News - at Roberts Photo News

If you're interested in getting related photography news along with your Photoshop tips,
RobertsPhotoNews.com is a great resource.

Included in the monthly newsletter are:

Photoshop Tips
Inspiring Stories
Book Reviews
Product Reviews
A Top 10 Tips Column
and more!

Here's a copy of the intro video

Saturday, August 27, 2011

Create Custom CD DVD Case Template

Create Custom CD or DVD Cases Fast!

We all have collections of CD's or DVD's
getting tossed around without their case right?

Next thing we have to throw them out
because they're too scratched to use.

Or, with the holidays coming, maybe we want
to create our own photo CD to give as a gift?

Here's a cheap, easy way to create your own
custom CD or DVD holders using Photoshop!

Use my template.

http://tinyurl.com/4cdcase

Using the link, just download
the Photoshop template and replace my artwork
with yours.

Use your inkjet printer to print on 8.5 x 11
standard paper, cover stock, or index.

Cut, fold and you're done!

Might just save a CD or make a great gift.
Or promotional product idea. Create custom cases
or designs for local business. Who knows!

Enjoy!


Friday, July 1, 2011

Chinese Photographer Bungles Photoshop Paste

Photoshop Paste Problem?
There's a right way to do Photoshop. And then, there are so many wrong ways to do Photoshop.

This photo represents a huge gaff for the Chinese photographer blamed for its creation. Apparently the photographer thought he could improve his original two shots by bring all three government road officials into one scene.

Unfortunately, he forgot that in order to effectively and seamlessly paste someone or something into a new scene you must physically connect them in some way.

Typically, we'll use a shadow of their body, or at least some darkening of the surroundings near their feet.

If we are going to sit them on something, or have them lying down we'll need to be sure to add both shadows or darkening AND some appropriate scrunching of their clothes at the contact points.

The key element to "Cut and Paste" Photoshop is that when complete you should not be able to tell. That means considering the quantity and quality of light between the two original photographs, as well as matching the direction of the light, and as we see here, grounding your subject into the new scene with shadows.

A tough public lesson to learn for this Chinese photographer, but hopefully, knowing these key points will keep you from ultimate embarrassment later on.

You can view the full story by Laura Rozen | The Envoy – Thu, Jun 30, 2011

http://news.yahoo.com/blogs/envoy/fake-photo-fallout-chinese-officials-embrace-social-media-171223649.html

Monday, March 28, 2011

SOLVING THE PHOTOSHOP PUZZLE


Sometimes, we know something is missing, but we just don't know what.

Photoshop is good at hiding stuff. Consider how many toolbar options there are. Consider how many sub-menu options are under each one of those. And how many drop-down box choices are even still under those. It's staggering!

But it gets worse.

Beyond what's on your desktop program, ready to use, Photoshop keeps a vast amount of options stored on your hard drive, (usually your C -drive) but not loaded onto your desktop version for immediate use. It stores all kinds of additional brushes, actions, filters etc. for use only when you need (and load them manually) into your current program.

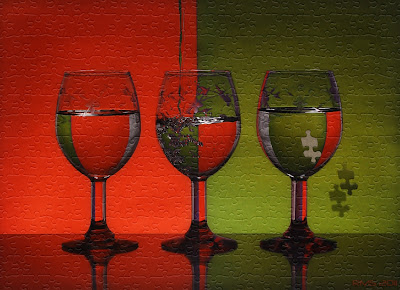
The PUZZLE FILTER is a good example. You already have the capability to create a puzzle, but you probably never knew it. That's because it's one of those hidden (on your C-drive) files that you have to call up when you want it.

To create a puzzle from any photo, load your photo into Photoshop in the usual manner, then create a duplicate layer and name that layer PUZZLE.

Next, go to the FILTER menu and choose TEXTURE
Under that, choose TEXTURIZER

You'll now see a little drop-down box. Click the arrow and then click on  LOAD TEXTURE
If it's your first time, you'll have to tell Photoshop where to find the file. Go to COMPUTER - C-Drive - PROGRAM FILES (or PROGRAM FILES (x86) and find PROGRAMS - ADOBE - PHOTOSHOP

Double click on the PHOTOSHOP file folder and look for a folder called PRESETS
Open that folder and look for PUZZLE.

Select the PUZZLE folder and click the button at the bottom marked LOAD

[You'll only have to go through this long procedure once.
Next time, you'll only need to click LOAD TEXTURE.]

Now, you'll see the dialog box you want to create your puzzle.
SCALE lets you determine HOW BIG the pieces are
RELIEF set the depth (or shadow darkness) of the piece edges
(You can also change the light direction  and have an option to INVERT your choice)

That's it.

If you want to get fancy with a 3-D effect like the photo shown above. Create a new layer under your puzzle layer, and give that a cardboard color and a bit of texture or pattern to look realistic.

Then, go to your puzzle layer and cut out one or more pieces. You can use the pen tool for most accurate results, but I find the MAGNETIC LASSO tool works just fine for most things, if you remember to click often to set your points.

Once you have the selection complete, go to LAYER - NEW LAYER via CUT to remove this piece. Use the move tool to give it a new location and then give it some shadow to separate it from the photo for that 3-D effect.

==========================================
While this tip is not included in the Original Photoshop Recipe Book, you will find hundreds of other great Photoshop tips for users of all versions in my "PHOTOSHOP RECIPE CARDS" book.

Why "LEARN" Photoshop...
just follow the recipes for great photos every time! 
See why everyone's lovin' these 
RECIPE CARD shortcuts...

Get your book today at: http://photoshoptipcards.com
===========================================

Saturday, January 22, 2011

Creative Photography Tricks Revealed

from CreativePhotographyTricks.com
Creative photography can add a whole new dimension and enjoyment to your photography.

It can turn so-so photos into stunning works of art. It can create interest in your work through online communities and in your own local community.

If you’ve lost interest in your hobby, or are struggling to come up with new projects that excite you, or you just want photography to be more fun, you owe it to yourself to explore the possibilities of adding a few creative photography tricks to your repertoire.

Nothing beats the feeling you get when the  “oohs and ahhs” start coming as folks look at your creative photos. It has been said that we humans need  praise and attention for good mental health as much as we need vitamins and minerals for good physical health.
Learning just a few new creative photography tricks is a great way to get your RDA of attention and praise.

It’s literally just a click away!

I’ve just opened a website that’s makes it fun and easy for you to get started in creative photography. In no time at all, you’ll be creating super cool photos to amaze and confound your friends. You’ll be their hero and leave them drooling in awe, bug-eyed at your new found skills!

Maybe you'll make a bit more cash with your new creativity too!

Best of all, it really helps us expand our Photoshop skills as we learn and play with these creative photography tricks.

Here’s a link to the new website…click on over and have a look!

http://creativephotographytricks.com

Wednesday, December 15, 2010

Text... Your Way!


Text...options beyond the Photoshop menu.

Many times you'd like to have your text in bold, or italics, but the options aren't offered in the Photoshop selection dropdowns. If you accept these limitations, you'll be forced to compromise.

But it doesn't have to be this way! You can have it YOUR WAY!

In the case of italics, you simply type your text, then right click on the text layer in your layers palette and select RASTERIZE LAYER. That will change your "text" into a "shape". (Be sure your spelling is correct because after you rasterize you can no longer change the individual letters or font without starting over).

Once your layer has been RASTERIZED (turned into a Photoshop shape) you can then use EDIT>FREE TRANSFORM to slant your text into italics. Hold down the Ctrl key as you drag your top corners to the right and you can achieve any degree of italic slant.

BOLD text can be achieved by simply making a copy of your text layer and changing the BLEND MODE on your new (top) text layer to MULTIPLY. And/Or, you can use the same method we used for italics, RASTERIZE to create a shape layer and then use TRANSFORM to make it just a bit larger too.

Photoshop gives us a lot of great gifts to work with, but it's nice to know we can still exchange them for what we really want. Options...who among us would not like more?

Robert Schwarztrauber

Reminder...Only a few days left to get your "Photoshop Recipe Card" book in the FREE Holiday Gift Box. Order by this Sunday (Dec. 19) to insure delivery by Christmas.

Saturday, December 11, 2010

3 Quick and Useful Photoshop Tips

Everybody's busy at the holidays (including me!)
so here's just 3 quick tips that will speed you
on your Photoshop way  - so you can get back out
there and finish your shopping!

1…Make a New Document from a Layer
To create a brand new picture from any layer,   
go into the Layers palette and choose Duplicate Layer. 
Then, change the document setting to "New”, say OK,
and begin working fresh on a new picture file from there.


2…Layers Palette or Tool Bar Getting in the way?
Press “Tab” to make them magically disappear.
Press "Tab" again and they’ll come back.

3…How’s the view?
Expand your viewing and work options by pressing the letter ‘F’
to toggle through your view options up to full screen.

That's it!

Go on now. There's is no more. Oh, wait. There is one more thing...

Until next time...remember to really take time to enjoy the holiday season because, as the late Andy Rooney  used to say, "Life is like a roll of toilet paper. The closer it gets to the end, the faster it goes."

We all could use just a little more time.

Robert Schwarztrauber


Thursday, December 2, 2010

Photoshop Creative Art with Filters


Sometimes, the best way to learn is to play!

The video above offers a fun way to use Photoshop Filters to create your own stunning art collection.

Photoshop is more than just a photo fixer. It's a powerful creator too!

Best of all, you'll be learning all sorts of useful Photoshop tips, tricks and techniques using layers, masks and blend modes while you're having fun!

No worries here mate! You can't ruin your photo because it's 100% Photoshop generated. And Photoshop does all the work with your artistic guidance!

Have a peek at the video. Then, for more inspiration, you can view additional samples on my web gallery at: http://robertschwarztrauber.weebly.com/photoshop-creative-art.html

Have fun while you learn and play with Photoshop Filters!

Robert Schwarztrauber

Then...be sure to order your Photoshop Recipe Card book today!
Now, shipped in their very own gift box thru December 25th.
Makes a great gift for less than 20 bucks!
http://photoshoptipcards.com

Thursday, November 25, 2010

Happy Thanksgiving!


Happy Thanksgiving
one and all!

Luckily, I was able to convince this fowl creature to give me his camera, before he smartly turned and swam off to safety. Far better to have the photo, than to talk about the one that got away.


While I'm certainly thankful for the coming of digital photography, and for the creative expression Photoshop provides, I am most thankful for the community of fellow artists and enthusiasts who allow me to share my passion with them. Thank you for your readership and contributions.

And I am thankful for all the many talented artists who share their work across the internet to inspire, to teach, and often just to amuse us with the products of their photographic and editorial skills.

So, to thank you for stopping by on this day of celebration, I will share with you not a tip, but a bit of artistic inspiration and amusement. I hope you'll enjoy the work these talented artists have created with the technology at hand, but mostly with the greatest gift that they got for free...their creative minds.

Here is a link to their work. Enjoy!

http://www.thephotoargus.com/inspiration/42-magnificent-photo-manipulation-examples-that-will-inspire-you/

Monday, November 15, 2010

Actions...Consistant, Time-Saving Results

Everyone laughed at Bill Gates. Crazy they thought. A computer in everyone's home? What for? All they do is multiply and subtract numbers at lightening speed.

But nobody's laughing at Bill now! Bill realized how much more potential computers really had. Now, in addition to being our favorite creative tool, they are also the worlds favorite communications device.

But still, at it's core, the computer is great for performing acts of repetition. And sometimes we need that in Photoshop.

Whether we want to process a folder of 100's of photos or just repeat a special effects process that someone else created, we can do that with Photoshop Actions. At the push of a button!

Enjoy this introduction to Photoshop Actions in the video below.

Lightening Fast Word Graphics

In the previous post, I promised to tell you how to create word graphics for Photoshop with lightening speed. It's a great tip I picked up from legendary Photoshop guru Matt Kloskowski, of NAPP fame.


Hope you enjoyed that shortcut. But the fun doesn't have to end there! Get really creative by playing with the blend modes. Add shadows, bevels, and highlights. Create a clipping path, add a filter, distort with free transform.

As the holiday season approaches, I'm reminded that it is so much fun to give. That's why I give these tips!

And...that's why giving your favorite photographer a gift-boxed copy of the nationally popular "Photoshop Recipe Cards" is one of the most affordable photography gifts you can give this year.

Check out the new holiday gift offer over at:
http://photoshoptipcards.com